Princess Celestia – Ruffles

Standard

The ruffles for the Celestia dress were a lot easier than I expected.  I estimated an hour per ruffle, but found that they really only took about 1/2 an hour each.  That was excellent as it took 2 hours off my expected time to which I’d already added 2 hours.  That means that, as of the ruffles, I’m on schedule.  Of course, I haven’t done any of the detailing, but it won’t be that bad.  You’ll notice that all of my explanation photos are of the green organza instead of the blue, which was my first tier done.  That’s because I totally forgot that I was creating a photo log of each of them.  The process was the same for each color anyway.  Also, this particular section will have less photographs and more diagrams because some of these are harder to photograph.

Ruffles (min 4 hours)
☒  Cut out 4 length patterns (width will differ on each tier)

The skirt measures 31″ at its longest point which means that, divided in quarters, the tiers should be just under 8″ each.  According to this tutorial, each layer should overlap the next by about 3″, so I added that and determined that the tiers should be 11″ long.

☒ Measure circumference at bottom of each tier

The lowest (blue) tier measured 60″.
Green measured 53″.
Purple meaured 39″
Pink measured 27″

☒ Cut out each color to be 2x the circumference by the length + ½ inch

☒   Pink (1 1/2 yds) ☒      Green (3 yds)
☒   Purple (2 yds) ☒      Blue (4 yds)
Sorry, organza is basically transparent.

Sorry, organza is basically transparent.

☒ Serge Fabrics and hem

 ☒     Pink  ☒     Green
 ☒     Purple  ☒     Blue

I serged each of the yards together at the short ends then serged all the way around the circle:

Serging pieces together

Serging pieces together

The ring of organza.  Looks like a giant scarf.

The ring of organza. Looks like a giant scarf.

☒ Gather stitch each piece

 ☒     Pink  ☒     Green
 ☒     Purple  ☒     Blue

Before I started this project, I had never gather stitched.  I gathered fabric manually which, when that’s the only way you’ve ever gathered anything, is actually pretty easy, but it really sucks to explain.  Luckily, we’re doing H.M.S. Pinafore at school and the entire costume wardrobe revolves around gathering.  Because of this, it was determined that it was high time I learned how to gather something with a machine.  A gather stitch is way easier than I thought.  Basically, you stitch a section of fabric without tacking down either end of the stitch and leave long tails hanging out.  Then you make the same stitch 1/4″ down and parallel to the first set of stitches.

gather1
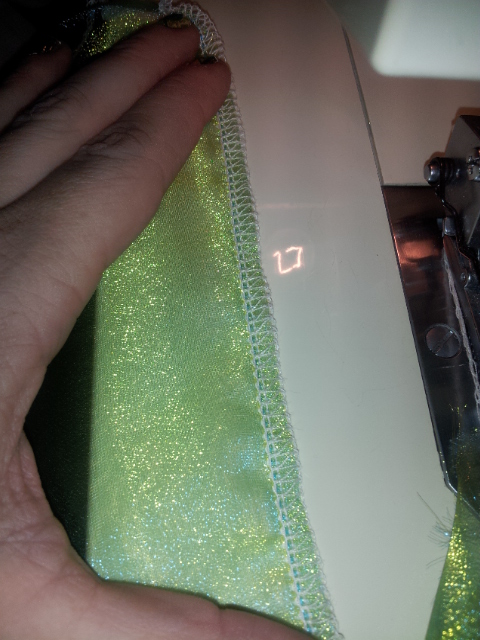
Then you pull one string from each line of stitches (either the top or bottom, but not both) and pull.  It gathers like magic!

gather2

I drew it by hand in GIMP. It’s the best I could do.

☒         Attach to skirt (starting at bottom)

 ☒     Pink  ☒     Green
 ☒     Purple  ☒     Blue

Step 4 Step 5

To ensure I got all the layers on evenly, I put the pink layer on first

To ensure I got all the layers on evenly, I put the pink layer on first

Step 7

Luckily the ruffles fix the issue with the skirt not quite covering the hoop.  Hoping no one will notice once it’s on display.  The purple layer is actually chiffon instead of organza, and for some reason, it moved the most when I was sewing the ruffles on the skirt.  I had to take it off and do it again.  Possibly my least favorite part of the dress.

Princess Celestia – Skirt

Standard

I knew starting out that the skirt would probably be the most time consuming part of the Princess Celestia dress.  Considering that I broke it into two parts in my build list, it was a fair bet.  Also, considering that I was making a bum roll for the first time in my life, I assumed that I needed some extra time.  I allotted 3 hours for the underskirt, and finished it in about 4.  I’ve discovered that the pattern making is an extra hour than I thought, so I’ll have to accommodate that for the Vanellope dress.  Luckily, there isn’t a whole lot of patterning in Vanellope’s dress.  It’s 90% pleating.

☒  Trace & size pattern (bum roll)

The original link I had for “how to make a bum roll” ended up confusing me, so I looked around until I found this site, which I had used before for their corset generator.  Anyway, their version was much easier and able to be altered to a child’s size than the first one I had seen.

1.  Put the hoop skirt on the dress form where you want it to fall.

1. Put the hoop skirt on the dress form where you want it to fall.

2.  Scrunch up a piece of aluminum foil the same length as her waist measurement.  Wrap it around the dress form's waist tightly.

2. Scrunch up a piece of aluminum foil the same length as her waist measurement. Wrap it around the dress form’s waist tightly.

3.  Remove the aluminum foil from the waist carefully.

3. Remove the aluminum foil from the waist carefully.

4.  Trace around the inside of the aluminum foil ring.

4. Trace around the inside of the aluminum foil ring.

5.  Because this was for a child, I measured out how far I wanted it to go from her body.  I marked 2 1/2 inches from the top and 2 inches on each side.  Draw a smooth curve between each mark.

5. Because this was for a child, I measured out how far I wanted it to go from her body. I marked 2 1/2 inches from the top and 2 inches on each side. Draw a smooth curve between each mark.

6.  Add seam allowance and trace with Sharpie.

6. Add seam allowance and trace with Sharpie.

☒ Make bum roll

7.  Cut out 2 pieces from your pattern.  Pin them together with a ribbon between them. Sew, leaving an empty spot in the middle.

7. Cut out 2 pieces from your pattern. Pin them together with a ribbon between them. Sew, leaving an empty spot in the middle.

8.  Turn the sewn piece and cut the ribbon in half.

8. Turn the sewn piece and cut the ribbon in half.

9.  Stuff the ring.  For the horns, you'll have to use the blunt end of a pencil to get the stuffing all the way down.

9. Stuff the ring. For the horns, you’ll have to use the blunt end of a pencil to get the stuffing all the way down.

10.  Hand stitch the opening closed.

10. Hand stitch the opening closed.

12.  Put it on the dress form and tie the ribbons in a bow.

12. Put it on the dress form and tie the ribbons in a bow.

☒ Trace & size pattern (skirt)

I decided my best bet for the skirt was to make a classic gored skirt.  For those that don’t know, a gore is a triangular shaped piece of fabric used to make a skirt wider at the base than it is at the top.  For this, I measured the bum roll, which was 28″, divided that in half and added 2 inches to each piece, so that I was left with 16″ a piece.  Then, the hoop skirt measured at 30″, so I added 3″ to the length.  I measured out four rectangles that were 16″ by 30″ and cut those out.  One piece was left whole for the center front.  One piece was cut in half lengthwise for the center back.  The last two pieces were cut into right triangles by drawing a line between opposite corners.  Important part:  The angles must be opposite to make the gores work properly.

pattern

The pattern’s layout

☒  Cut out fabric

I cut out each piece and serged it to prevent raveling.

Step 13

☒ Assemble skirt

Here’s where the part about the opposite angles comes in.  Take your two right triangles and lay them, right sides together, with their vertical edges together then sew them together.  This will leave you with an almost equilateral triangle.

gores

I then sewed the rectangular pieces to the angled sides of the triangle to make the complete skirt

Step 14

Seen here with the bum roll around the dress form’s neck.

I now wish I had sewn the long sides together in hopes that the sides would be longer than they are, but I pinned up the ruffle on the hoop skirt.  It looks really cute with the ruffles either way.

☒ Attach to bodice

As the skirt was slightly larger than the bodice, I gathered it on and let it hang.

☒ Hem

As it was already a little short, I decided to leave the hem serged instead of doing a true hem.  I don’t think anyone will see the difference.

Princess Vanelllope – Design Phase

Standard

I knew I’d need to make at least one more dress for Celestia for Phoenix Comicon.  That’s because she grew a bit since last year.  I was hoping for something like Merida from Brave or freaking Wonder Woman or really anything but what has happened.  See, we went to see Wreck-it-Ralph which, in my humble opinion, is the best movie that Disney has ever made.  You are welcome to disagree with me, but I will still think that.  It’s a beautiful movie with definitive amazing moments for anyone who has ever played any video game.  There was a time that Celestia leaned over and said, “Mommy, I want to cosplay Vanellope for Comicon.”  Yeah, I have a kid that knows the word cosplay.  Moving on.

She says this and I did a small celebration because Vanellope looks like this:


Totes cute

How hard could it be to find a green hoodie and leggings like that?  It can’t be at all!  Then this happened (SPOILER ALERT):

I’m working on finding the video version of this. If you haven’t seen the movie – do it now. RIGHT NOW!!

I knew then what was going to happen and many, many curse words flew through my head.  At the same time, I said to myself, “But if you’re going to make an amazing costume, where are you going to get a better source?”  I cursed myself for I don’t know half of the techniques needed for this dress.  If you didn’t catch it all, here’s a better picture because it’s an artists’ rendering.

So many pleats…

So, I drew it out to figure out all of its elements.  Yes, I had a great picture to work with, but for some reason, it’s much easier for me to figure out all the ins and outs of a design if I draw it.  Here’s my version of Princess Vanellope’s dress.

Do you see all that pink?  There are 5 different colors of pink in this dress!

Do you see all that pink? There are 5 different colors of pink in this dress!

And from that drawing, I made a list of all of its elements and immediately started to research sources of every single thing that’s in this dress.  Here’s that list as it sits right now.  I’ll re-list the sources as I get to that part.

I should probably explain some of those.  First, I didn’t make a hoop skirt.  As mentioned in the Princess Celestia design, I bought one for $20 because it was just so much easier.  For those that don’t know what a bum roll is, it’s what makes a skirt over a hoop look rounded.

If you look at my Princess Celestia build list, you’ll see that the bum roll is actually there instead on the Vanellope list that is yet to come.  That’s because I need one for both dresses and the MLPcon is before comicon.  Anyway…I also found the ruffle dress for both the dresses because it talks about the overlap of the ruffle layers and how to attach them to a skirt.  A whisk collar is that huge heart-shaped thing that’s behind her head.  There are no tutorials on the internet for one of those.  The best I could find is that company that makes them – for $300 – that’s more than twice my budget for both of the dresses that I’m making.  I looked at the steps they’re taking and thought they look a lot like organza fairy wings.  I have a tutorial on organza fairy wings in the hopes that I can merge it into the whisk collar.  Finally, the pleats on that dress are accordion pleats.

There’s a build list for this, but it’s 2 pages long, so I’m going to wait until I actually start it to add the build list to this post.

Princess Celestia – Bodice

Standard

This is the first stage of the Princess Celestia dress.  It took me about 4 hours, which is longer than I expected, but I ended up having to do the sleeves twice, so I might have come in under my time, if I’d done it right the first time.  Here’s how it went:

Bodice
☒  Make pattern

Originally, I was going to use McCall’s 3050 (which is no longer in print and doesn’t seem to be on McCall’s website for me to link to) which we have in our pattern collection at work.  I traced the size larger than my daughter then, intelligently, I left the muslin that I traced the pattern on at work.  Because I knew I couldn’t put off starting the dress any longer, I went to my back-up plan – make my own.  I altered my typical method to reflect the darts that were in the base pattern.

1.  Lay a shirt that fits her well on muslin and trace it in pencil.

1. Lay a shirt that fits her well on muslin and trace it in pencil.

2.  Draw in the sleeve holes and expand the lower section to make darts.  Alter the neck line to reflect design.

2. Draw in the sleeve holes and expand the lower section to make darts. Alter the neck line to reflect design.

3.  Trace the pencil lines in permanent marker.

3. Trace the pencil lines in permanent marker.

4.  Repeat steps 1-3 , but keep the collar high for the back.

4. Repeat steps 1-3 , but keep the collar high for the back.

Then you have to add seam allowance.  My friend/coworker Sarah found this cool pin that details how to easily make a seam allowance.  I followed those instructions.

5.  Tape 2 pencils together.  Put one pencil on the seam line and draw.  This will create a perfect 1/4" seam allowance.

5. Tape 2 pencils together. Put one pencil on the seam line and draw. This will create a perfect 1/4″ seam allowance.

6.  Trace the seam allowance line with permanent marker.  Label the fold line.

6. Trace the seam allowance line with permanent marker. Label the fold line.

☒  Sew muslin

For the first time in my life, I made a muslin.  I cut out my bodice pieces out of muslin and sewed it together to make sure it fit right.  It was nice to see that my first attempt at designing darts into my pattern worked perfectly.

☒  Cut out fabric

There is this magical item out there that’s called marking paper.  It has either white or colored chalk on it.  You’re supposed to use it to mark lines from patterns on your fabric, like dart lines.  I don’t own marking paper, and I was on a roll, so I marked along the dart lines with pencil several times then turned the pattern over and traced the other side of the pattern along the same lines.  The result was a transfer of the pencil line onto the back of my satin.

Step 15

☒  Assemble bodice (minus side seams)

Then I sewed the shoulder seams together and hung it on the dress form to wait.

☐  Attach gold ribbon at collar

I didn’t do the detail yet, because I haven’t put it on Celestia to make sure that the bottom of the collar is the right place.

☐ Closure in the back (zipper? + 30 min)

Trying to think about how I want to close this dress.  I hate zippers and I’m putting that off until the rest of it’s done.

Sleeves
☒  Make pattern

There were a lot of steps I took to make the sleeves because I want them puffy.   I had to spend some time finding the original tutorial I used to learn how to make puff sleeves originally.  Here it is.

7.  Trace one side of the arm hole and leave an inch out on the body side.

7. Trace one side of the arm hole and leave an inch out on the body side.

8.  Measure down the length of the sleeve from the top of the curve and complete the sleeve shape.

8. Measure down the length of the sleeve from the top of the curve and complete the sleeve shape.

9.  Cut the sleeve pattern into 6 pieces.

9. Cut the sleeve pattern into 6 pieces.

10.  Spread the pieces out evenly on another piece of muslin.

10. Spread the pieces out evenly on another piece of muslin.

11.  Trace out the pieces of the pattern on the muslin piece.  Add seam allowance around it.

11. Trace out the pieces of the pattern on the muslin piece. Add seam allowance around it.

12.  Cut the pattern into 4 and retrace those pieces with 1/2" of seam allowance on attaching sides.  Label the colors they'll be.

12. Cut the pattern into 4 and retrace those pieces with 1/2″ of seam allowance on attaching sides. Label the colors they’ll be.

☒  Cut out fabric

13.  Cut out 2 pieces of each color.

13. Cut out 2 pieces of each color.

☒  Serge organza while assembling
☒  Serge perimeters

14.  Serge the pieces together then serge around the outside.

14. Serge the pieces together then serge around the outside.

☐ Attach gold ribbon
☒  Attach sleeves to bodice

15.  Gather the sleeve into the sleeve hole.

15. Gather the sleeve into the sleeve hole.

☒  Sew side seams and sleeves

16.  Sew the side seams and sleeve seams.

16. Sew the side seams and sleeve seams.

☐ Elastic

I’ll put the elastic in once I put it on her.

Princess Celestia – Design Phase

Standard

If there’s anything that my daughter loves as much as Black Widow, it’s My Little Pony.  I don’t have anything against MLP, in fact, I like watching it with her, when I get the chance.  However, I have some of my wonderful, crazy friends that are also crazy fans of My Little Pony.  Negate the argument against whether girls that like MLP are bronies or pegasisters, my friends are both.  One day, I was sitting around feeling creative when the thought popped into my head, “What would the ‘Mane 6’ wear to a ball, if they were human?”   Don’t ask me what made me think this, but I sat down and drew them as well as Princesses Celestia and Luna.  They aren’t great, but this is what I came up with:

Don't judge me, all I had was crayons.

Don’t judge me, all I had was crayons.

Fast forward several months, when I had already forgotten than I drew these.  My dear friend sends me a message that, here in Phoenix, we’re going to have our first My Little Pony convention and that she wants to take my daughter.  Now is the moment that I mention that my daughter’s name is Celestia (she came before the pony princess), and I realize that it would be silly to not send her to this convention dressed as Princess Celestia.  This also gives me the first opportunity to make something I truly designed by myself without any additional input.  So, I looked at my old design and re-drew it with a neater eye and better colored pencils so that it looks like this:

Hooray for colored pencils!

Hooray for colored pencils!

Now I have a new fun design for a pretty little girl dress that has the colors of Princess Celestia’s mane and tail woven through the dress.  The first thing I did was pull a trick out of my boss’s book.  Nola has a collection of paint swatches she’s collected that we take with us when fabric shopping in order to make sure our fabric choices are as close to optimal as possible.  So I went to Home Depot and picked up these paint swatches:

The blue went missing somewhere...

The blue went missing somewhere…

Then I went to the local discount fabric store (people in Phoenix need to go check out SAS fabric) where, by some luck, they had organza on sale in the exact colors I needed!  Check it out!

Total = $40

Total = $40

I also got white bridal satin and a child’s hoop skirt.  I chose to purchase the hoop skirt for 3 very important reasons:

  1.  It was $20.
  2. I didn’t have to make it
  3. It was $20.

So, I made my build list and I’ve estimated how long each piece is going to take to make.  I’ll put my estimations in my posts on each piece of the dress so that I know how well I’m estimating my time.

Here’s my build list as it stands.  As I post the sections, I’ll link to them from this list as well as back to it from them.

Bodice (min 1.5 hours)
☐  Make pattern
☐  Sew muslin
☐ Fit
☐  Alter muslin pattern
☐  Cut out fabric
☐  Assemble bodice (minus side seams)
☐  Attach gold ribbon at collar
☐ Closure in the back (zipper? + 30 min)
Sleeves (min 1.5 hours)
☐  Make pattern
☐  Label each piece for color
☐ Cut out fabric
☐ Pink
☐ Purple
☐ Blue
☐ Green
☐ Serge organza while assembling
☐ Serge perimeters
☐ Attach gold ribbon
☐ Attach sleeves to bodice
☐ Sew side seams and sleeves
☐ Elastic
White Skirt (min 3 hours)
☐ Trace & size pattern (bum roll)
☐ Make bum roll
☐ Trace & size pattern (skirt)
☐ Sew muslin
☐ Fit
☐ Take apart
☐ Cut out fabric
☐ Assemble skirt
☐ Attach to bodice
☐ Hem
Ruffles (min 4 hours)
☐ Cut out 4 length patterns (width will differ on each tier)
☐ Measure circumference at bottom of each tier
☐ Cut out each color to be 2x the circumference by the length + ½ inch

☐      Pink ☐      Green
☐      Purple ☐      Blue

☐ Serge Fabrics and hem

 ☐     Pink  ☐     Green
 ☐     Purple  ☐     Blue

☐ Gather stitch each piece

 ☐     Pink  ☐     Green
 ☐     Purple  ☐     Blue

☐         Attach to skirt (starting at bottom)

 ☐     Pink  ☐     Green
 ☐     Purple  ☐     Blue

H.M.S. Pinafore – Tap Outfit

Standard
Seriously, the most adorable thing ever.

Seriously, the most adorable thing ever.

I work in the costume shop at Grand Canyon University, and right now, our drama department is preparing to put on H.M.S. Pinafore.  During the overture, there will be a dance number complete with 5 tap dancers dressed in that cute thing up there.  I can’t take credit for this design at all.  My amazing coworker Sarah Levinson thought it up one morning.  We simultaneously celebrated and bemoaned her idea for a British flag detailed corset can only be done in one way – by hand.  Though I only constructed one of the five corsets, I detailed four of them – something that has resulted in many needle sticks and what may be a permanent dimple on my second finger (the one I use to push the needle through the fabric).  However, I am glad to say that, by the time I was done with the last corset, my detailing time had decreased from 5 hours per corset to 3.

If you’re in the Phoenix area, you should really consider coming to GCU’s production of H.M.S. Pinafore.

Do-it-yourself Dressform

Standard

When you make clothes for a child, you run into one big problem – the child isn’t always there.  If you want to buy a brand new child-size dress form, you’re going to spend a minimum of $100, and they aren’t adjustable like the good adult-size ones.  So, if you want a dress form that’s your child’s size, expect to buy a new one about every 2 years, less if your child grows slowly.  I don’t know about you, but collecting dress forms at $100 buck a pop just didn’t sound fun to me, so I’ve been limited to sizing clothes when my daughter’s around.  When your daughter is a competition gymnast and a Girl Scout, she just isn’t around.Anyway, one day, while shopping for the fabric for the designs that inspired this blog, I decided that I was just going to price dress forms.  Fortunately for us all, I typed in “child size mannequin” instead of dress form.  That’s when I found this amazing tutorial.  It was amazing!  The ability to make a mannequin for under $20?!?  Excellent!  I therefore set out to make my own, for the .  The materials you’ll need to make my version of the mannequin:

  • Measuring tape
  • Wooden Dowel
  • Flower pot (make sure the dowel fits snugly in the drain hole)
  • Hot Glue & Glue Gun
  • Bath Towel
  • Quilt Batting
  • Packing tape
  • Muslin
  • Needle & Thread
  • A partner
All the materials

All the materials

Here are the steps I took to make my own, especially for my daughter:

1.  Measure your child’s shoulder height, neck length (chin to shoulder height), and torso length (shoulder to where the bottom meets the thigh).  Measure him or her around his/her shoulders, chest, natural waist (at the belly button), and the waist.  Write all that down.
2.  Cut the dowel rod 2 inches longer than your child’s shoulder height.
3.  Turn the flower pot upside down and insert the dowel into its drain hole.  Mark the dowel at the top of the flower pot.

Marking the height of the flower pot.

Marking the height of the flower pot.

4.  Take the dowel out.  Depending on how snugly your dowel fits in the pot’s drain hole, wrap 1 to 2 layers of duct tape centered on your pencil mark.  This will make the hole watertight.

I used 1 piece of duct tape torn in half lengthwise to get two layers.

I used 1 piece of duct tape torn in half lengthwise to get two layers.

5.  Place the dowel back in the drain hole (you might have to work it to get it in).  Hot glue around the hole and allow to cool.
DSCN0850

6.  After the glue has dried, cut a strip of quilt batting that has a width of your child’s neck length.  The length of the strip will vary by your child’s neck circumference.  I just cut a few strips from the top of my quilt batting roll and figured that I’d cut more as I needed.  At the top of your dowel, put a bead of glue about as long as the width of your strip:
DSCN0853
Press the batting onto the glue (not to hard, or you’ll burn yourself 60 times like I did) then put 2 beads of glue around the circumference of the dowel, one at the top of your batting strip, and one at the bottom.  Wrap the batting around the glue and press.  Continue to add glue and wrap until you finish the strip.  IMPORTANTAt the end of a strip, always put a vertical bead of glue and then start the next strip the same way.  Measure the neck circumference regularly until you get to your childs’ (it’s always better to go a little over).  You’ll be left with what looks like a giant roasting marshmallow:

The dressform's neck

The dressform’s neckDSCN0856

7.  I’m not totally sure why the original tutorial has you make the body out of a towel, but I’m sure that the poster had extras lying around.  If that’s the case, you can make the body completely out of towels/blankets or you can use only quilt batting.  I did both.  First, I laid the towel on the floor and folded the long ends until the towel was the same length as my daughter’s torso.  Then I hot glued the folded parts down.

Look!  A towel!  How exciting!

Look! A towel! How exciting!

Then, I proceeded to glue the towel onto the dowel (hah, those rhyme!) in much the same way as I did the neck piece.  The only difference was I did 4 or 5 beads around the circumference instead of just 2 at the top and bottom.  When I ran out of towel, I continued with quilt batting until the roll was the same circumference as my daughter’s shoulders (that bit’s important).
DSCN0859
8.  Here is where I drastically changed from the original tutorial.  The woman who made the mannequin did just that – she made a mannequin. It was to display clothes on, not size clothes with, so it doesn’t have to look like a human.  I wanted a dress form, so I improvised.  First, I had my daughter “hug” the batting from the side to squeeze it into a more oblong shape.  Then I wrapped packing tape vertically from the bottom of the torso, over the shoulders, and back down again.  I did 2 or three strips of packing tape on each shoulder in this way.

If you're wondering, I could have used duct tape, but packing tape seemed easier to reposition, if I got it wrong.

If you’re wondering, I could have used duct tape, but packing tape seemed easier to reposition, if I got it wrong.

9.  Then, an inch or so down from the shoulder (this will differ depending on your child’s arm width), I wrapped my measuring tape around the body and pulled it to where it was my daughter’s chest measurement.  I had her hold the tape like that and wrapped packing tape around the body just below the measuring tape (having 2 types of tape here is confusing, sorry).  I wrapped it tight enough that the batting shrank to the size of her chest.  We repeated this at the waist and hips (they are smaller than the shoulders) et voila!  It looked like a person!

Well, you know, as much as this can look like a person...

Well, you know, as much as this can look like a person…

10.  Now we return to the original tutorial.  Use left over “neck” strips or cut some more and wrap them around the neck and down to create the curve from neck to shoulder.  One or two layers should do it.

It looks like she's wearing a scarf.

It looks like she’s wearing a scarf.

11.  At this point, I pulled the neck piece up and wrapped the whole thing in muslin.  At some point, I’m going to trim the muslin up and sew it on…someday.  I had some problems because the dowel was now so top heavy that it was off center and wobbly.  I suppose that’s the draw of the torch stand that’s in the original, but I couldn’t find one.

It's a ghost!!

It’s a ghost!!

12.  I couldn’t work with it, because it was so wobbly and off center.   That picture up there doesn’t do it justice, but the dressform was leaning at about a 5-10º angle.  This wouldn’t work for even hems!  So, my dad had this great idea!  We hung the dressform upside down between two chairs (I really wish I had a picture of this) by the flower pot.  We then mixed plaster of Paris into the flower pot and let it set over night.

Yum.

Yum.

The plaster secured the dowel in a perfectly vertical configuration due to the fact that hanging it upside down made the dressform obey gravity.  The duct tape and hot glue made the drain hole water tight, and we didn’t have plaster go anywhere we didn’t want it to.

So, there’s my homemade dressform.  I hope that you enjoy it, and I’d love pictures of your own.  I’m sure you could make it for an adult, but I haven’t tried it yet.

Black Widow

Standard
My daughter's Black Widow Halloween Costume

My daughter’s Black Widow Halloween Costume

My daughter loves The Avengers – a lot.  She begged to be Black Widow for Halloween.  Not wanting to make a whole body suit because of all of the craziness that’s involved in that, I went to my local dance store who just happened to have a long sleeve, full body suit in her size on sale for $4.  There are days I’m convinced I’m meant to win.  I went to Jo-ann’s and found some shiny spandex meant to make a full leotard and, instead bought only 1 1/2 yards.  I patterned the breast plate off of my personal drawing and created stripes down the arms and legs (see pictures below).  Every piece of the shiny vinyl was hand appliqued.  The belt was obtained from my work – it’s a basic vinyl belt with a plastic buckle.  I painted the hourglass on with silver paint.  However, it constantly shifted throughout the night rendering the work pointless.  I met another mom who made her daughter a legit Black Widow buckle and am waiting for her to tell me that she found the mold so that we’ll have one for Comicon, but the outfit looks awesome either way.  I used my embroidery machine to make the shield logos on the shoulders (also below).
If you’re thinking of making your daughter her own Black Widow outfit, this only took about 4 hours, and even then it was because I spent 3 hours in the hand-sewing portion of this costume.  Assume that you’ll have to attach elastic stirrups to the legs to keep them in the boots, and that you’ll have to attach lights to her in some way.  This is the most unsafe Halloween costume ever!!!  If it is dark, your child will disappear into the darkness, just like the real Black Widow!  The benefit of this costume is that my daughter can literally do her gymnastics floor routine in it, so it gives them freedom of movement that can’t be beaten.

My original sketch.

My original sketch.

Side view showing her SHIELD patch.

Side view showing her SHIELD patch.

Indoor picture from the back shows the contrast between the applique and the bodysuit

Another indoor picture to show the contrast of the front.  Note that this was taken before the stirrups were added.

Another indoor picture to show the contrast of the front. Note that this was taken before the stirrups were added.

Introduction

Standard

Hi!  My name is Jen.  I suddenly realized today that I am about to embark on about 50 or 60 hours of costumes for my daughter and that it would behoove me to create a log of my creative process from sketch to completion.  Some of my entries will be more of a description of the process than a full detailing with pictures because I made it before I thought of the blog.  I’m also open to any questions about how you would create a costume you want to make.